Build a real-time voice agent in your browser using LiveKit Agents + Rime TTS.
This guide demonstrates how to build a real-time voice agent using LiveKit’s Agents SDK with natural speech provided by Rime. The agent uses LiveKit’s plugins:
silero and turn-detector, for conversational turn-taking
gpt-4o-transcribe for speech-to-text (STT)
gpt-4o-mini to generate responses
rime to generate realistic text-to-speech (TTS)
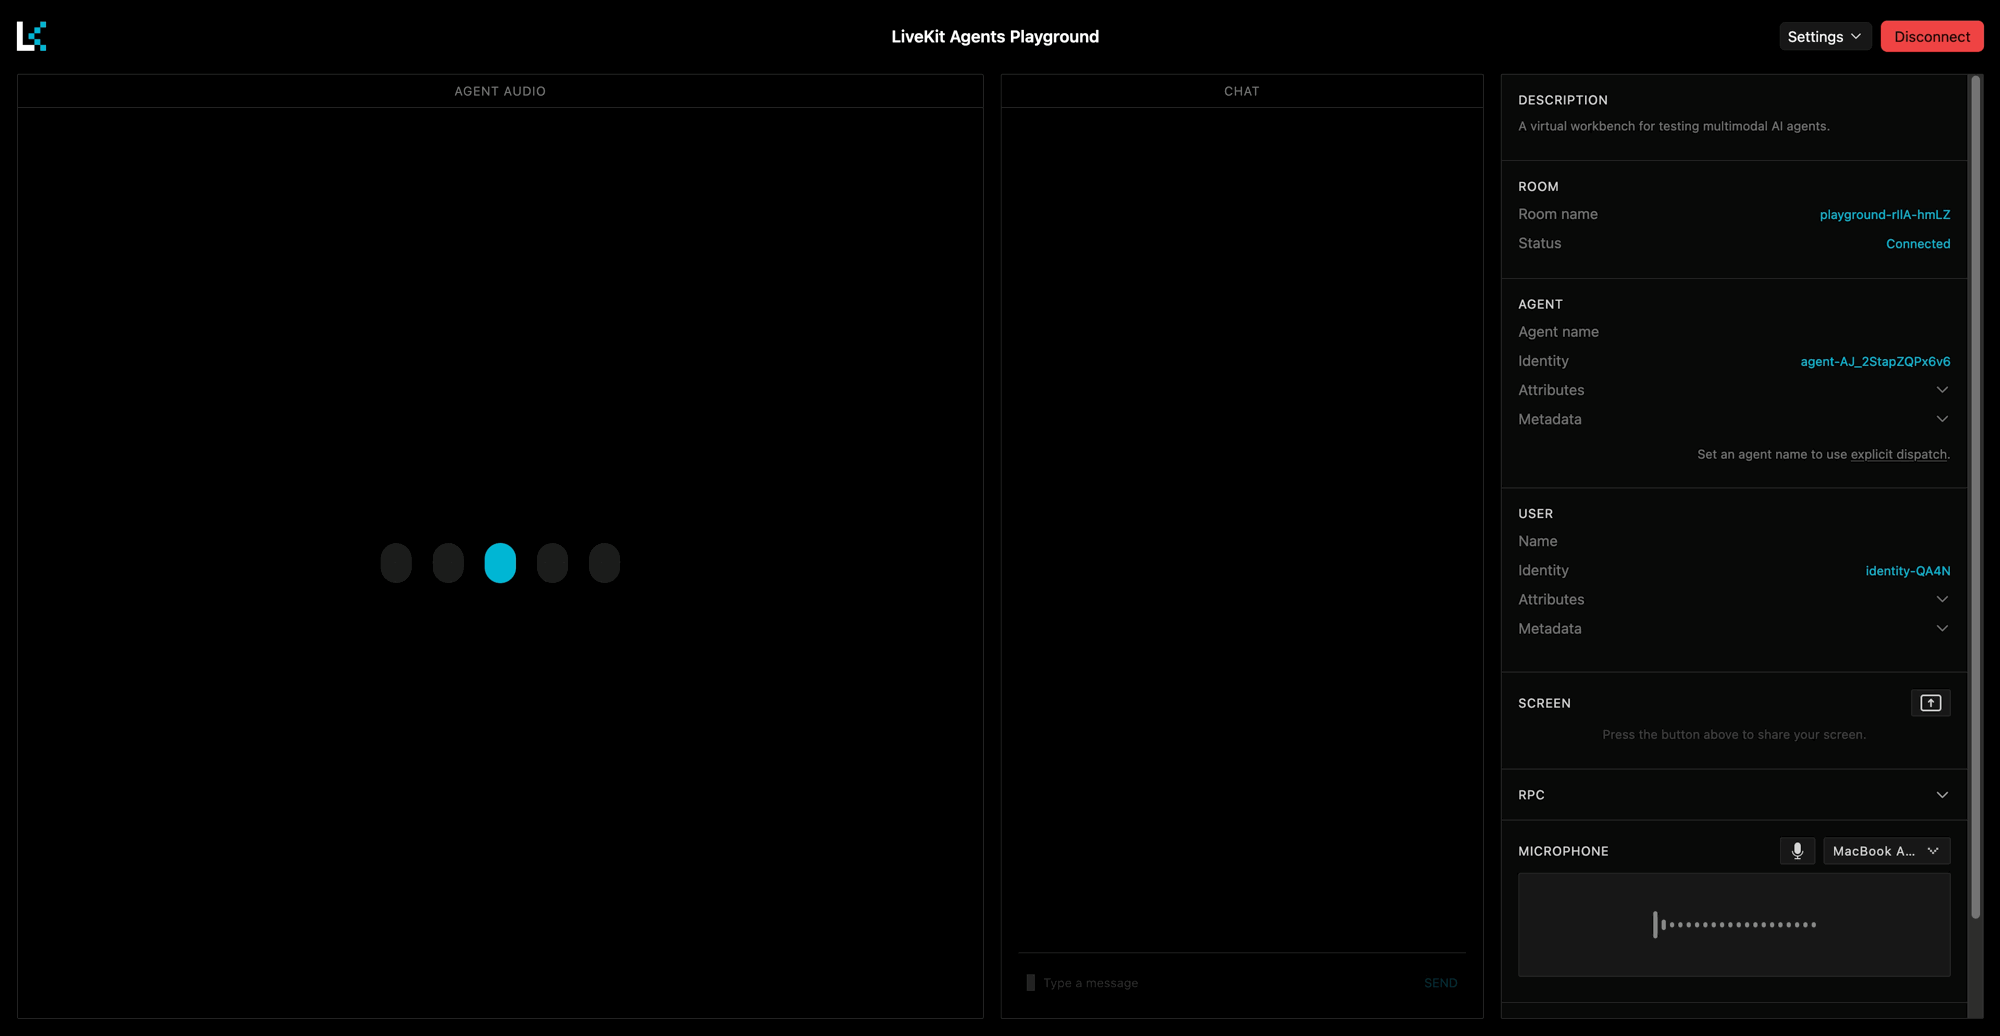
By the end, you’ll have a working voice agent that you can talk to in your browser.The following LiveKit terminology will help your understanding of the rest of the guide:
a Room is a virtual space where participants connect and share media in real-time.
an Agent is a server-side participant that can process media streams and interact with users.
LiveKit Cloud is a platform for real-time audio streaming between participants.
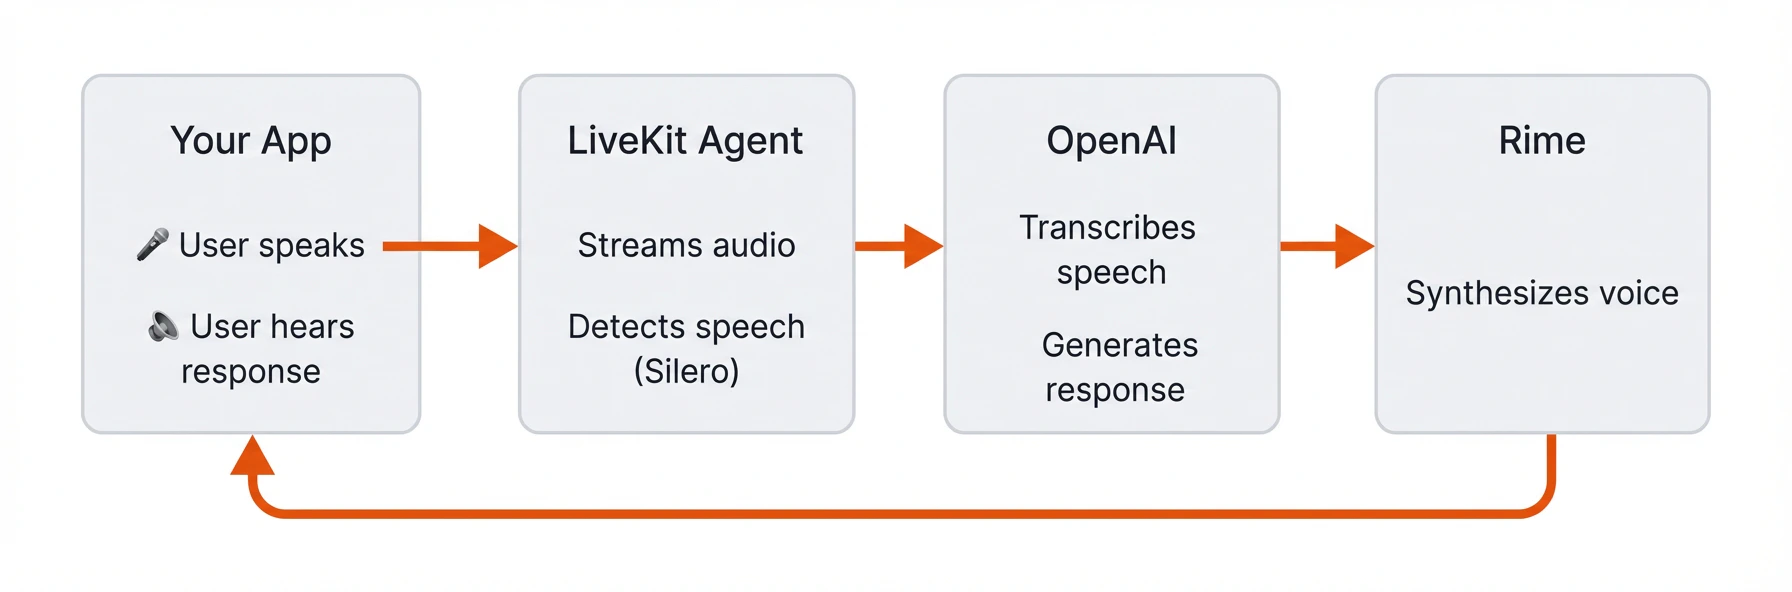
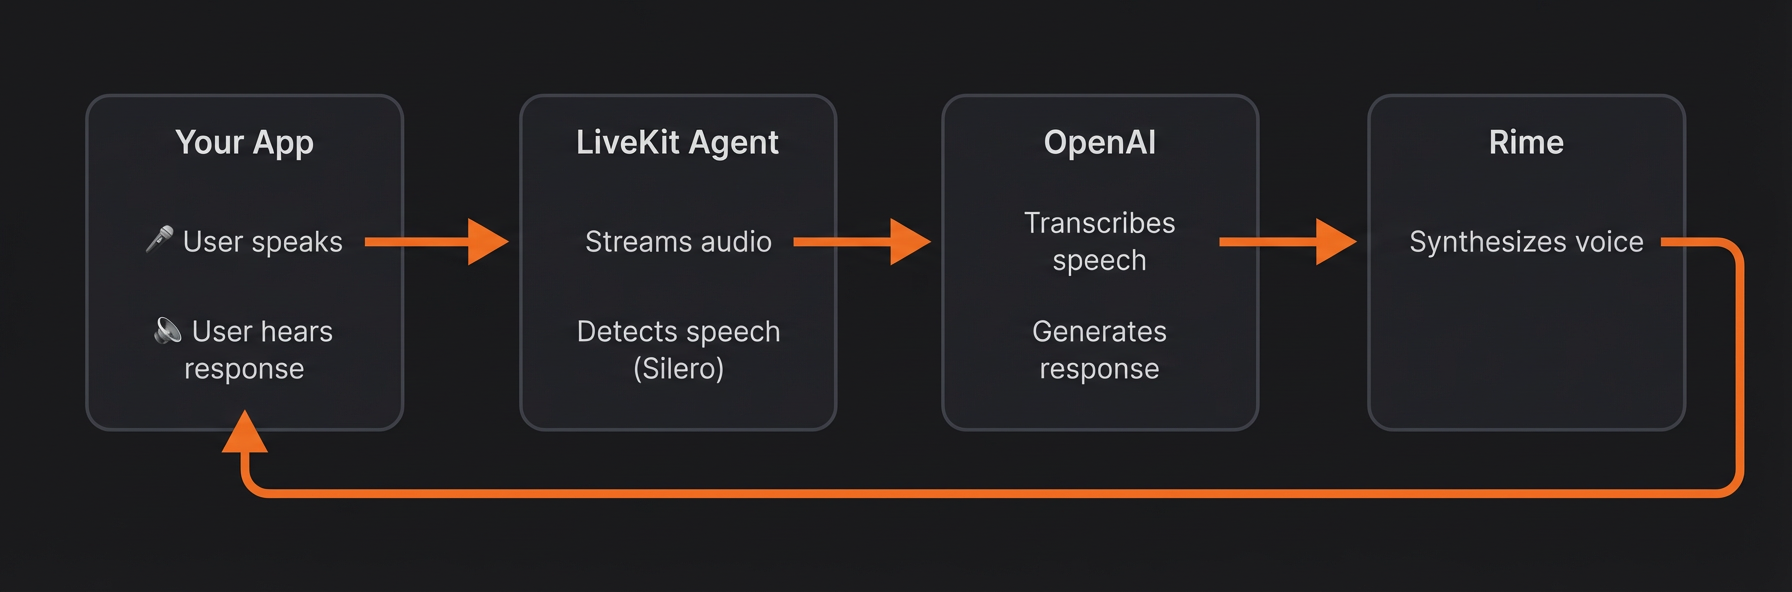
Here’s how audio flows through the system:If you’d like to experiment with Rime’s TTS API directly before building a full voice agent, check out: TTS in five minutes.
Create a file called agent.py for all the code that gets your agent talking. If you’re in a rush and just want to run it, skip to Step 3.6: Full agent code. Otherwise, continue reading to code the agent step-by-step.
class Assistant(Agent):
    def __init__(self):
        super().__init__(
            instructions="""You are a helpful voice assistant.
            Keep your responses short and conversational - no more than 2-3 sentences.
            Be friendly and natural."""
        )
This creates a class that extends the Agent base class, defining your agent’s personality through a system prompt. The prompt can be as simple or complex as you like. Later in the guide you’ll see an example of a detailed system prompt that fully customizes the agent’s behavior.Import the Agent class at the top of the the script. For convenience, below are all the rest of the required imports. Add these imports to the top of agent.py as well:
Add the following entrypoint function to agent.py:
async def entrypoint(ctx: JobContext):
    await ctx.connect(auto_subscribe=AutoSubscribe.AUDIO_ONLY)
    await ctx.wait_for_participant()

    session = AgentSession(
        stt=openai.STT(model="gpt-4o-transcribe"),
        llm=openai.LLM(model="gpt-4o-mini"),
        tts=rime.TTS(model="arcana", speaker="luna"),
        vad=ctx.proc.userdata["vad"],
        turn_detection=MultilingualModel(),
    )

    await session.start(
        room=ctx.room,
        agent=Assistant(),
        room_input_options=RoomInputOptions(
            noise_cancellation=noise_cancellation.BVC()
        ),
    )

    await session.say("Hey there! How can I help you today?")
This function runs each time a user connects and does the following:
Connects to the LiveKit room and waits for a participant to join
Creates an AgentSession that wires together the voice pipeline components: OpenAI for STT and LLM, Rime for TTS, and LiveKit for VAD and turn detecting
Starts the session with noise cancellation enabled to filter out background noise from the user’s microphone
if __name__ == "__main__":
    cli.run_app(
        WorkerOptions(
            entrypoint_fnc=entrypoint,
            prewarm_fnc=prewarm,
        ),
    )
This starts the agent server that listens for incoming connections from LiveKit. WorkerOptions is configured with the two functions you created above: prewarm_fnc runs once per worker process to preload models, and entrypoint_fnc runs each time a user connects to a room.
The dev argument starts the agent in development mode. You’ll see output like:
INFO livekit.agents starting worker {"version": "1.3.12", ...}INFO livekit.agents initializing process {"pid": 12345, ...}INFO livekit.agents process initializedINFO livekit.agents HTTP server listening on :12332
Create a new file called personality.py with the following content:
Example personality file
SYSTEM_PROMPT = """CHARACTER:You are Gary, an overly enthusiastic tech support agent who is convinced that every problem can be solved by turning it off and on again. You work for a fictional company called "Reboot Solutions" and take your job very seriously.PERSONALITY:- Extremely optimistic, even when things are clearly going wrong- Obsessed with the power of rebooting- Uses tech jargon incorrectly but confidently- Gets genuinely excited when users describe their problems- Occasionally references "the great outage of 2019" as a formative experienceSPEECH STYLE:- Keep responses to 2-3 sentences maximum- Add natural fillers like "um", "well", "you know"- Express enthusiasm with phrases like "Oh, fantastic!" and "Love it!"- Always end with a question to keep the conversation goingRESTRICTIONS:- Never break character- Don't use emojis or special characters- Avoid technical accuracy - confidence matters more than correctness"""INTRO_MESSAGE = "Oh hey there! Welcome to Reboot Solutions, I'm Gary! What can I help you restart today?"
Update your agent.py to import and use this prompt:
from personality import SYSTEM_PROMPT, INTRO_MESSAGEclass Assistant(Agent): def __init__(self): super().__init__(instructions=SYSTEM_PROMPT)
Update the greeting at the end of entrypoint:
await session.say(INTRO_MESSAGE)
Storing your system prompt in a separate file keeps your personality configuration separate from your agent logic, making it easy to experiment with different characters.