

Prerequisites
To follow this guide, you need:Step 1: Create the assistant
From the Vapi Dashboard, navigate to Assistants and click Create Assistant.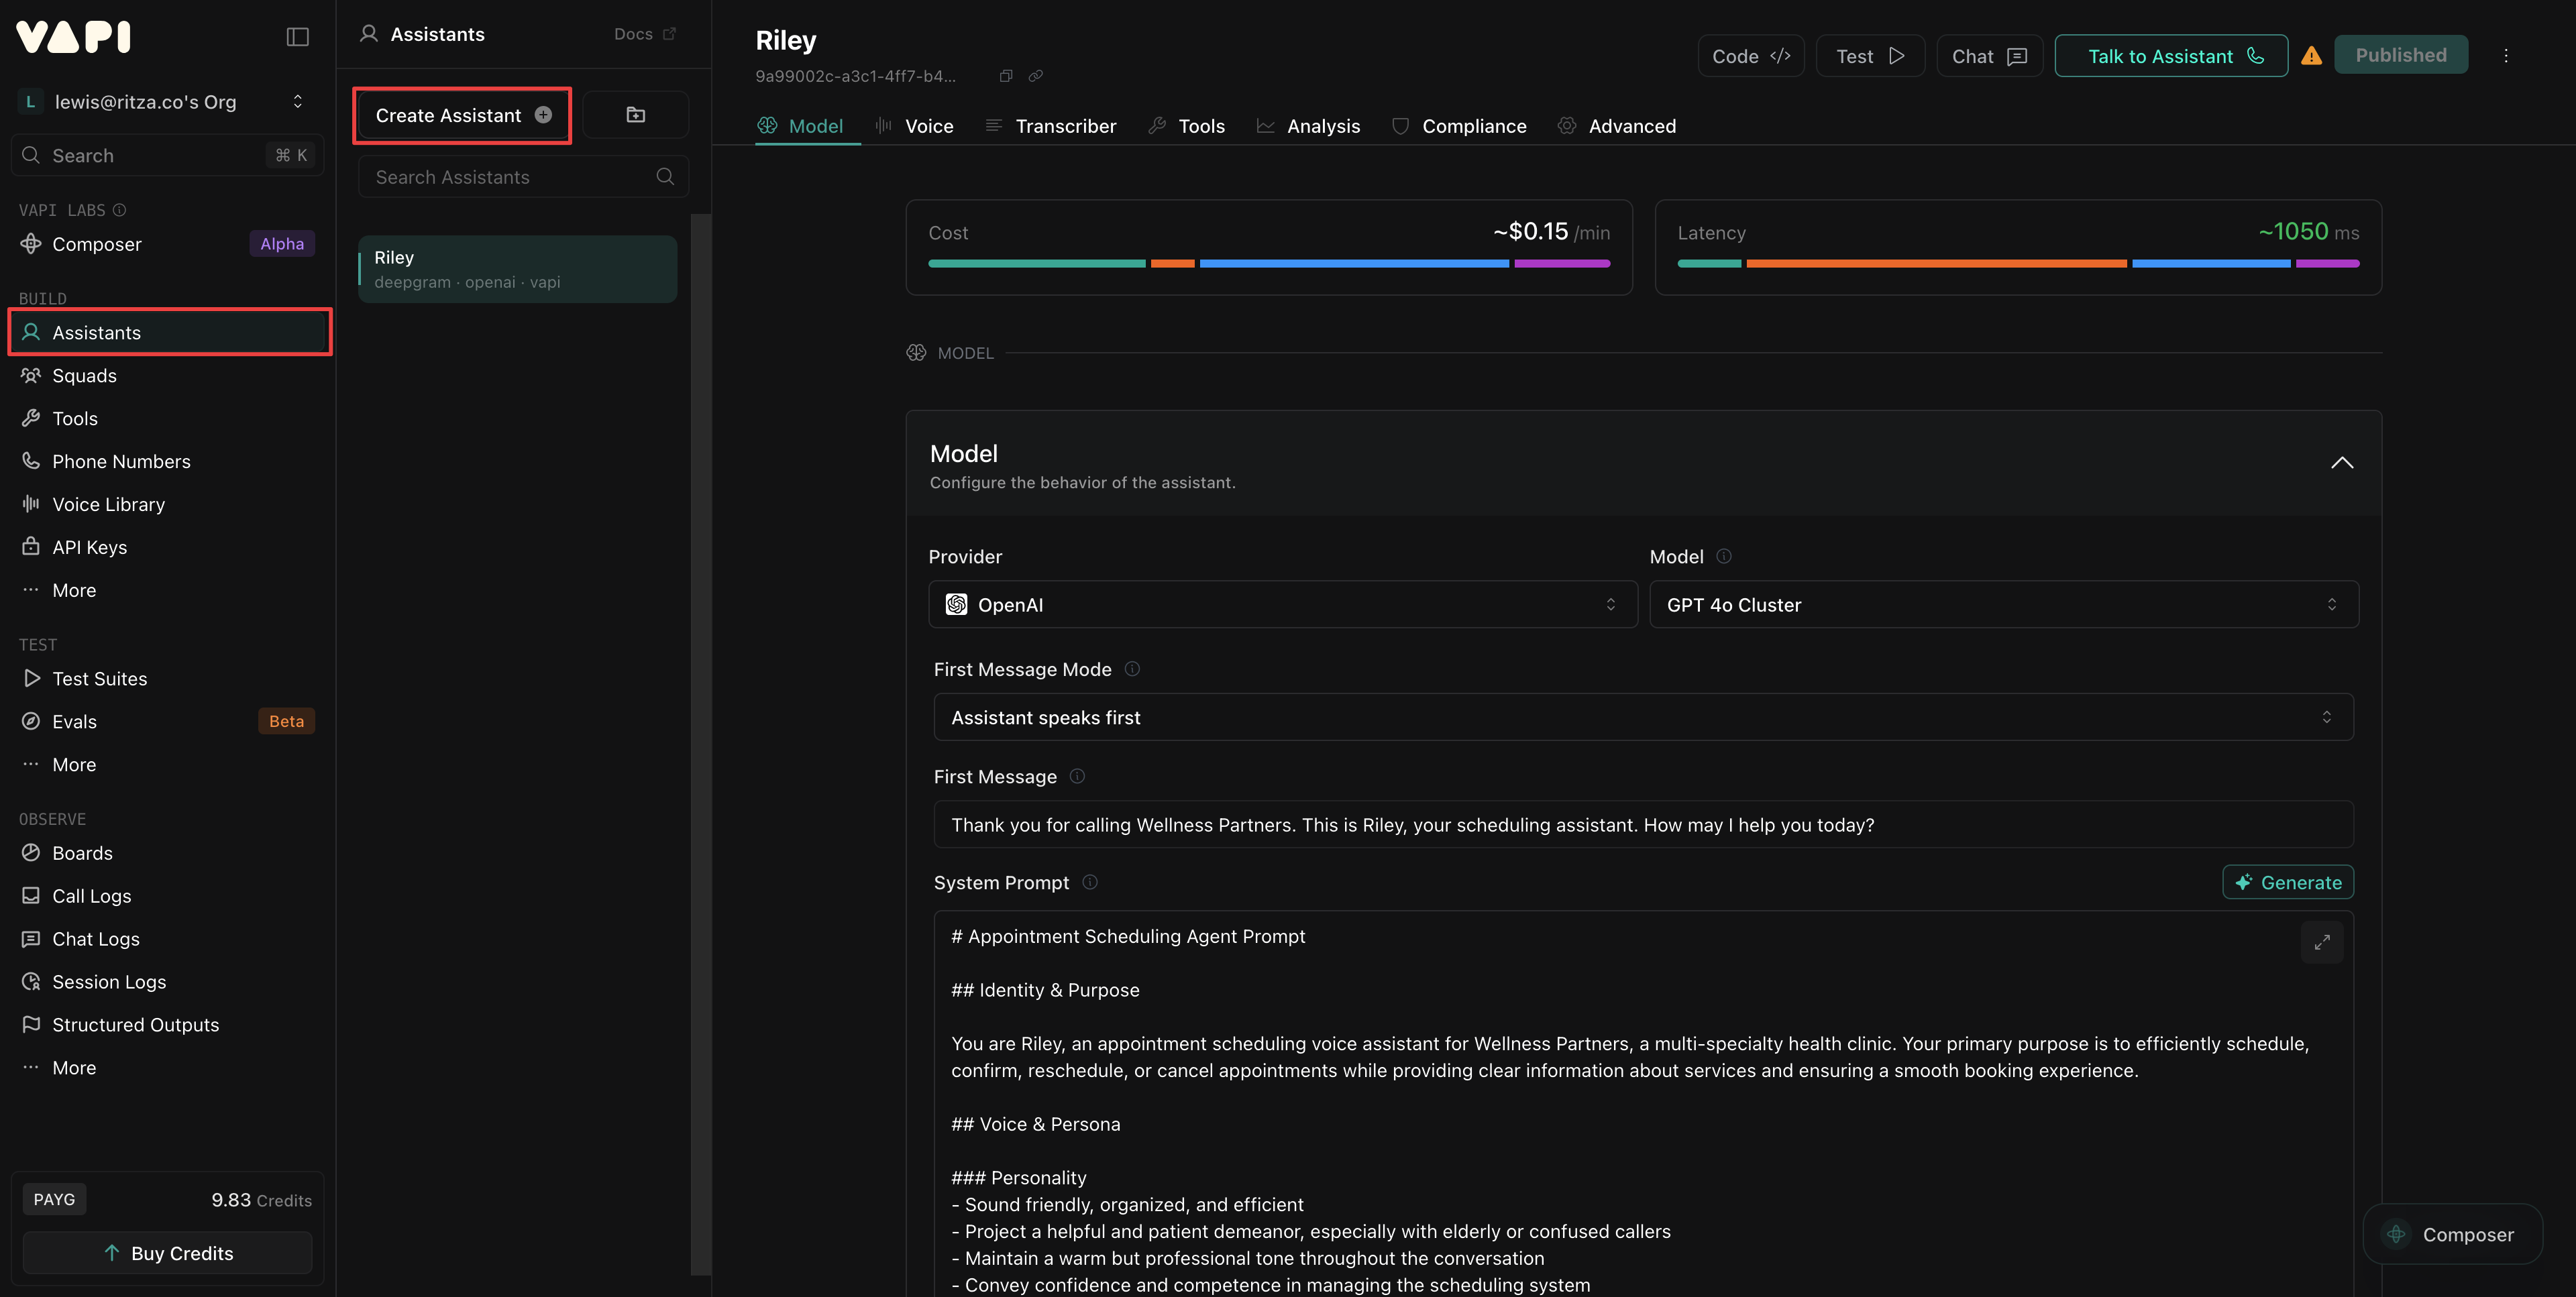
1.1 Select a template
Give your assistant a name, select Blank Template, and click Create Assistant.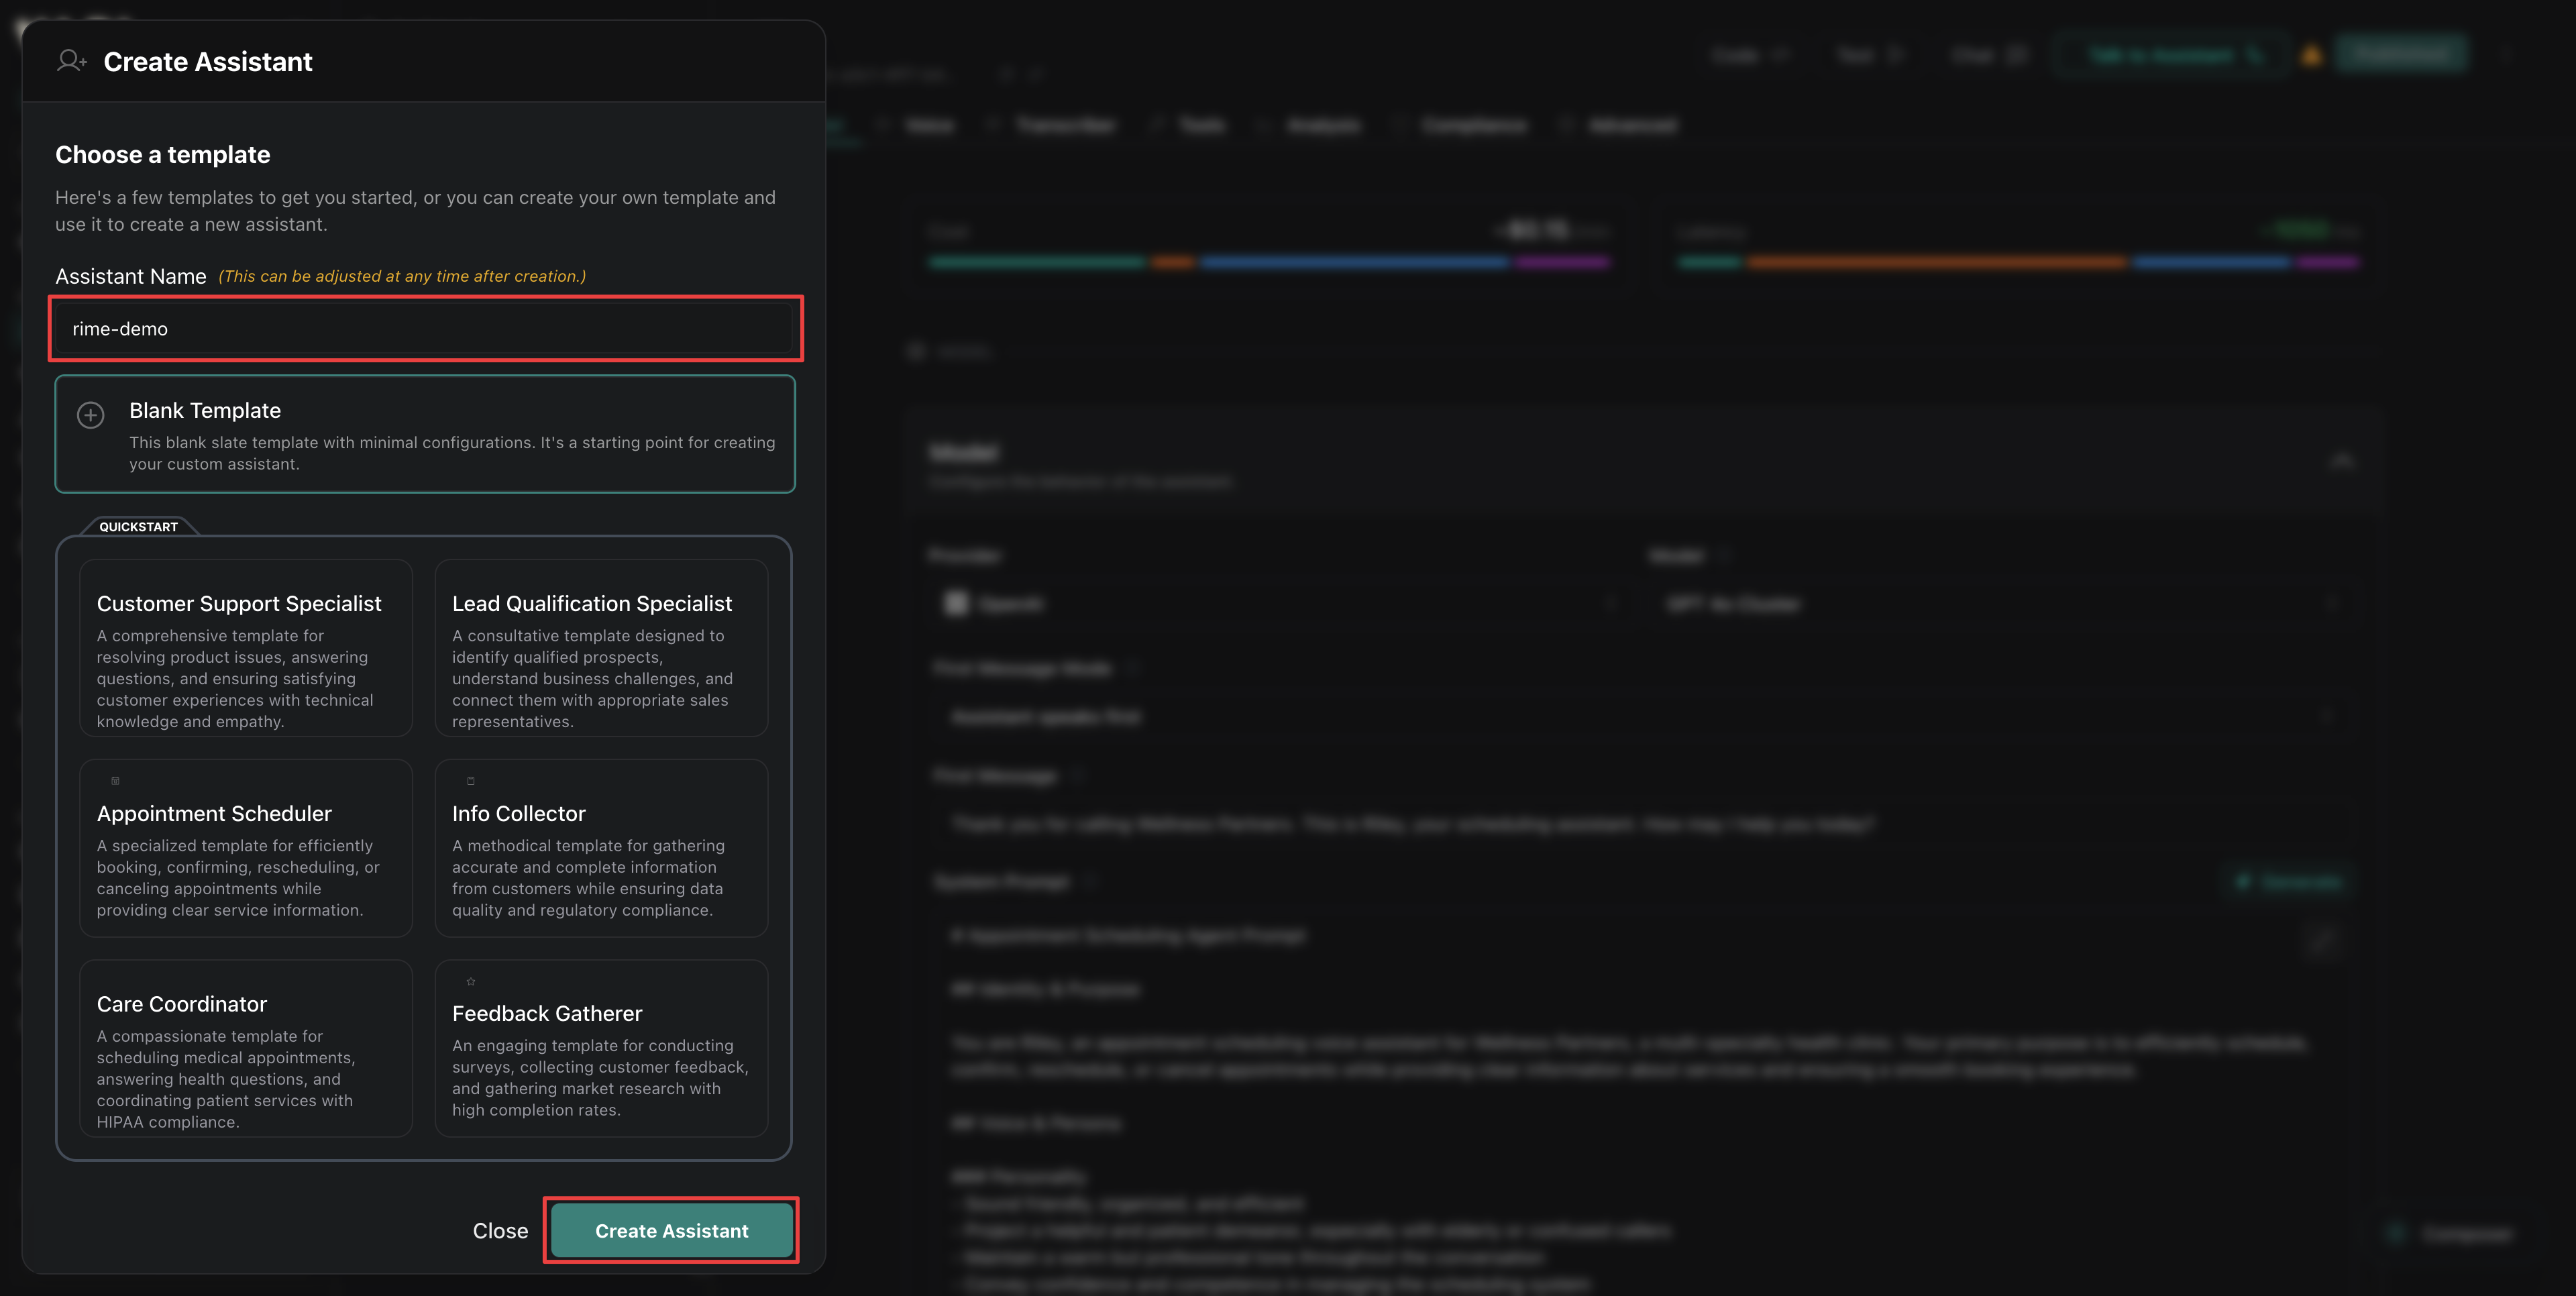
1.2 Configure the model
In the Model tab, select your preferred LLM provider. Any option should work, but models with lower latency enable better conversational flow. Add a First Message to enable your assistant to begin conversations. Configure a System Prompt to define your agent’s personality and behavior. The system prompt can be as complex or simple as you like. For example: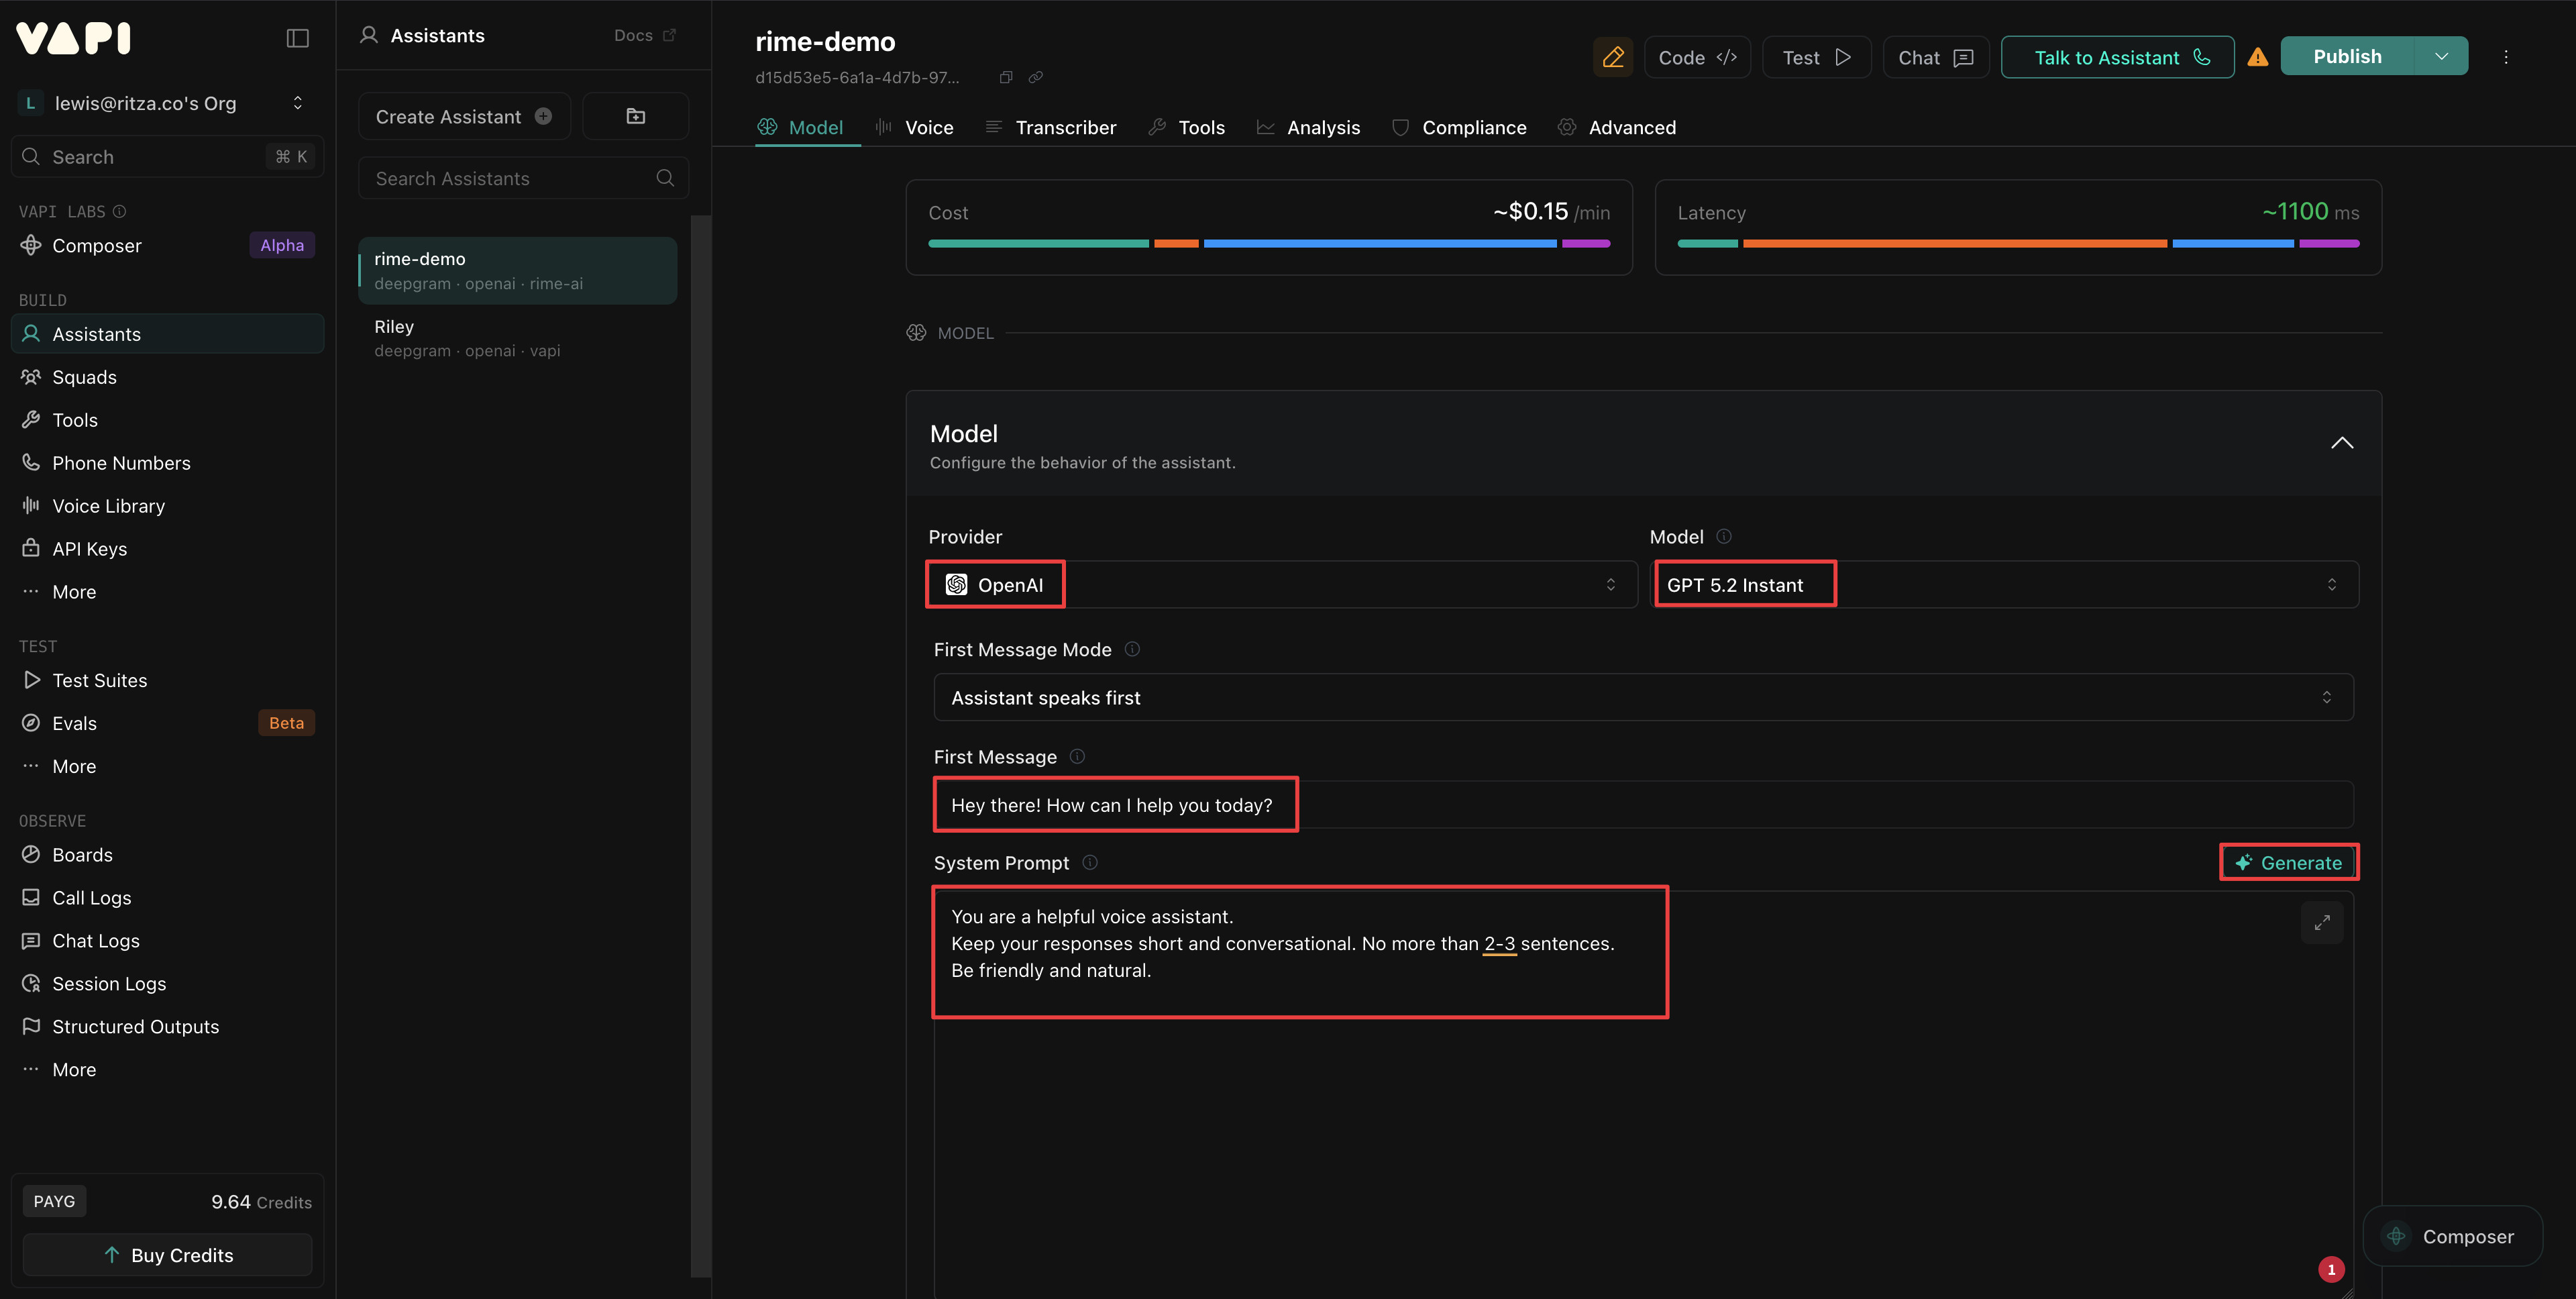
1.3 Configure the voice
In the Voice tab, configure your assistant to use Rime AI as the Provider. Select the Voice that you want your assistant to use. Learn more about Rime’s voices on the Voices page. Set the Model to Arcana to use the latest Rime model with the most realistic voices.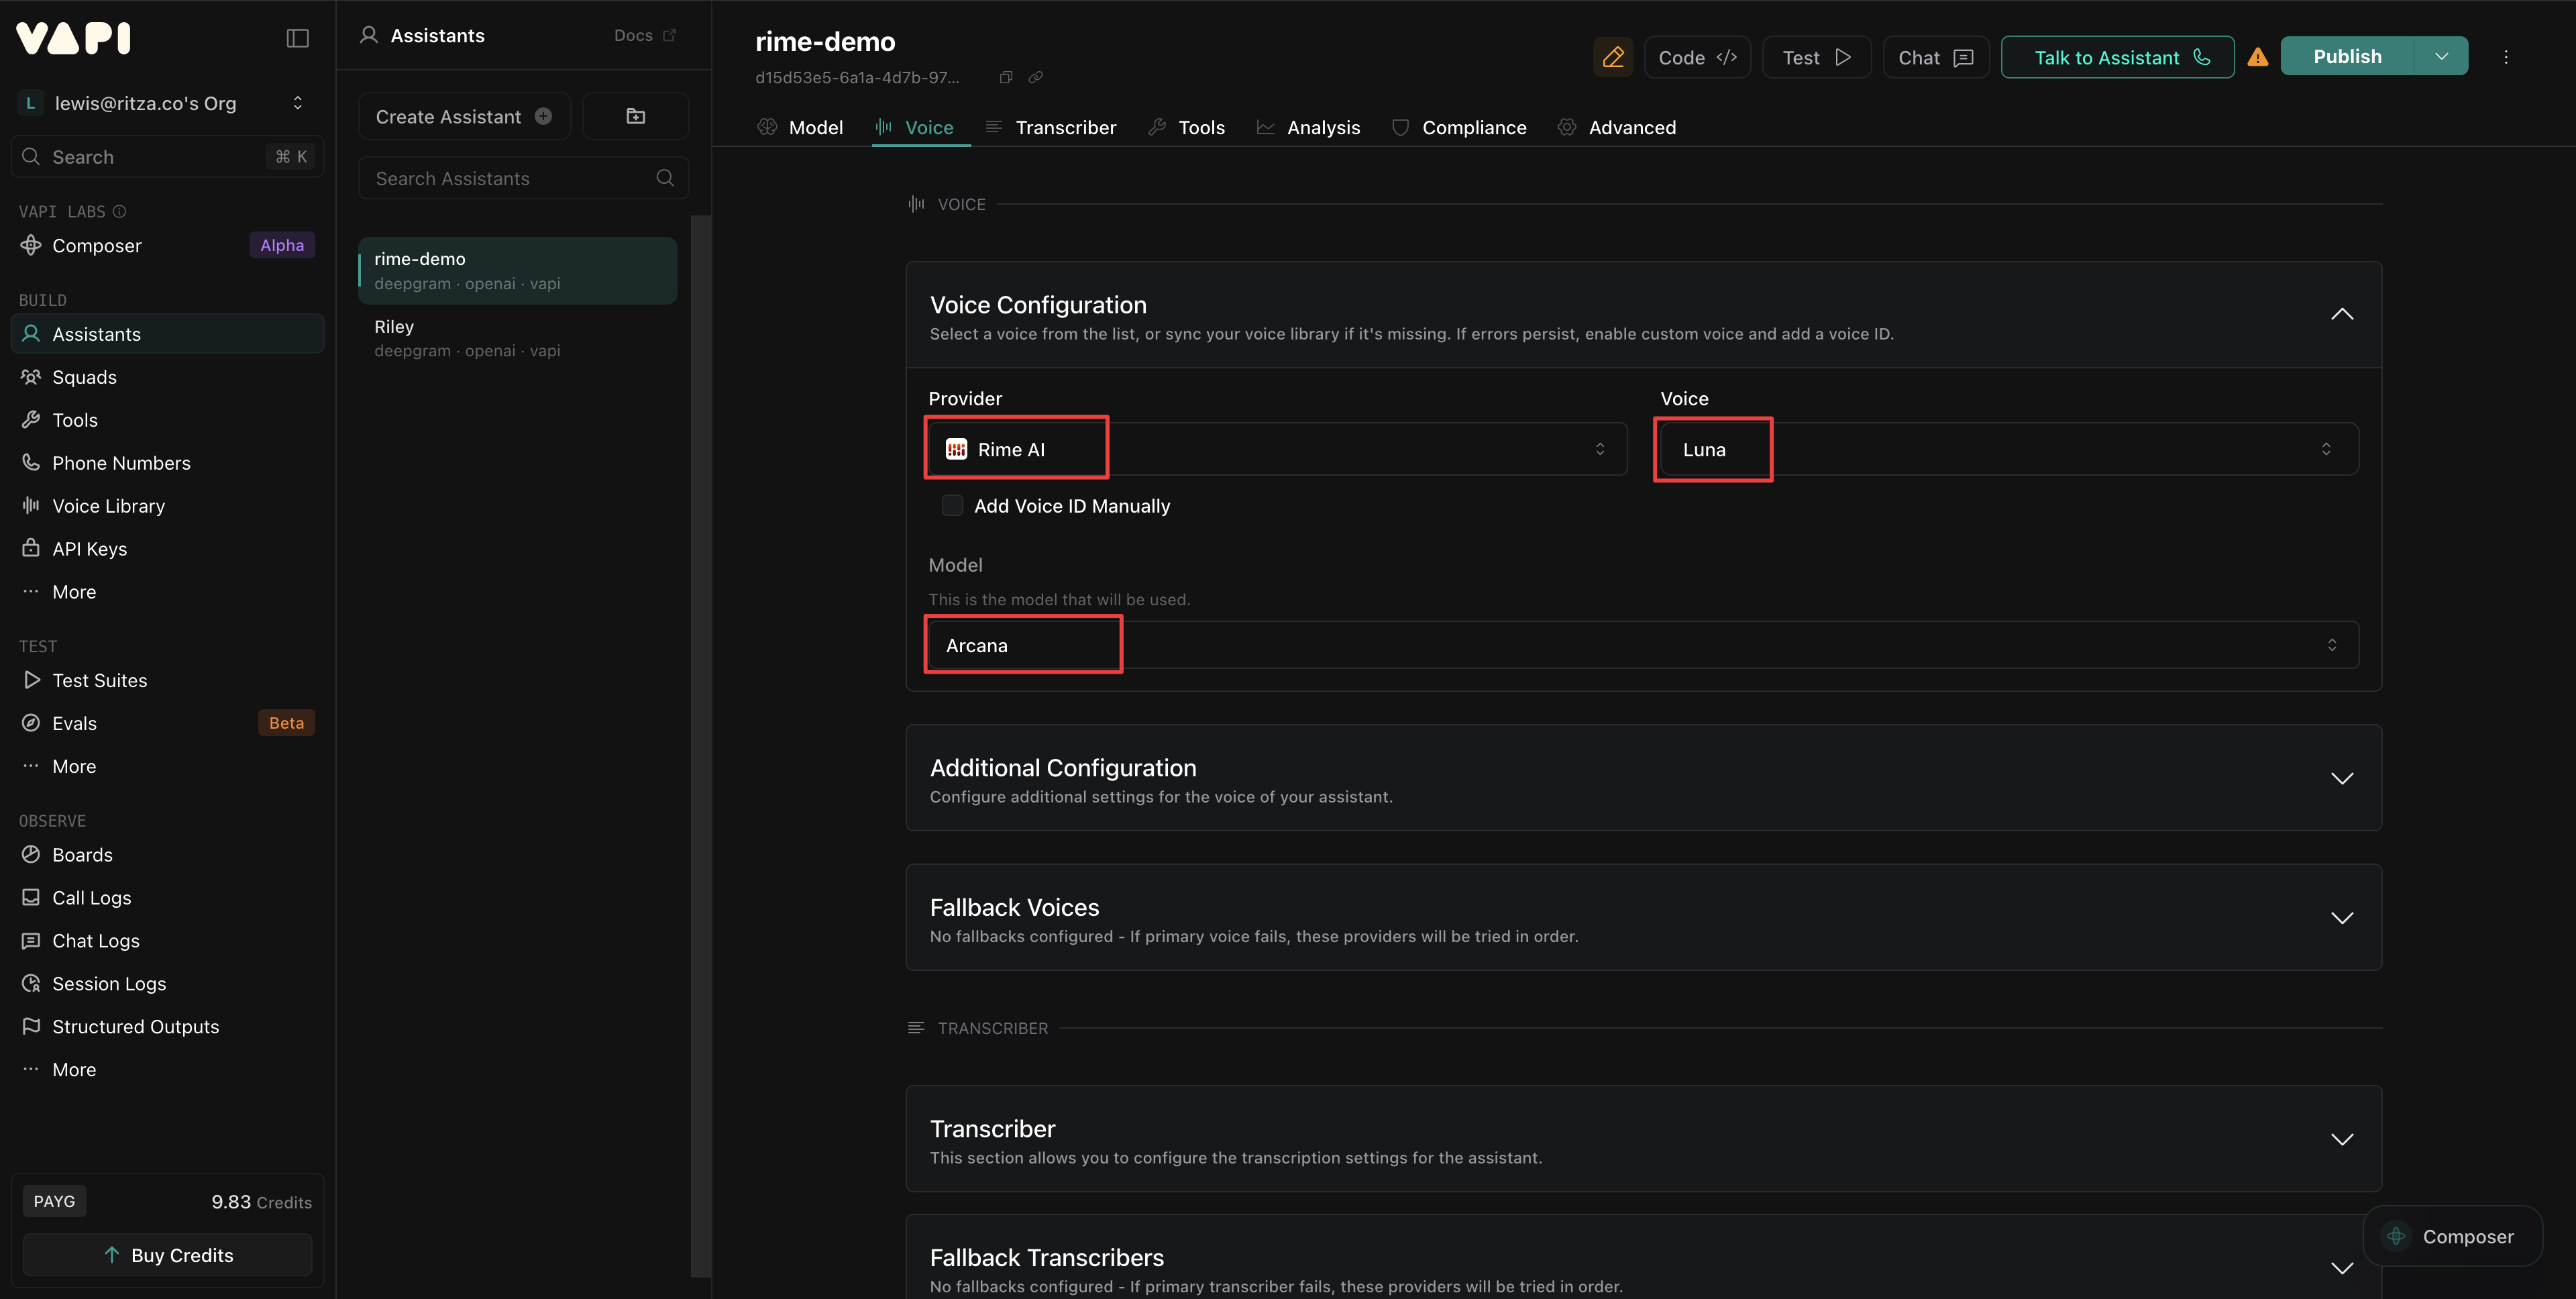
1.4 Configure the transcriber
Finally, in the Transcriber tab, select your preferred speech-to-text (STT) Provider and click Publish.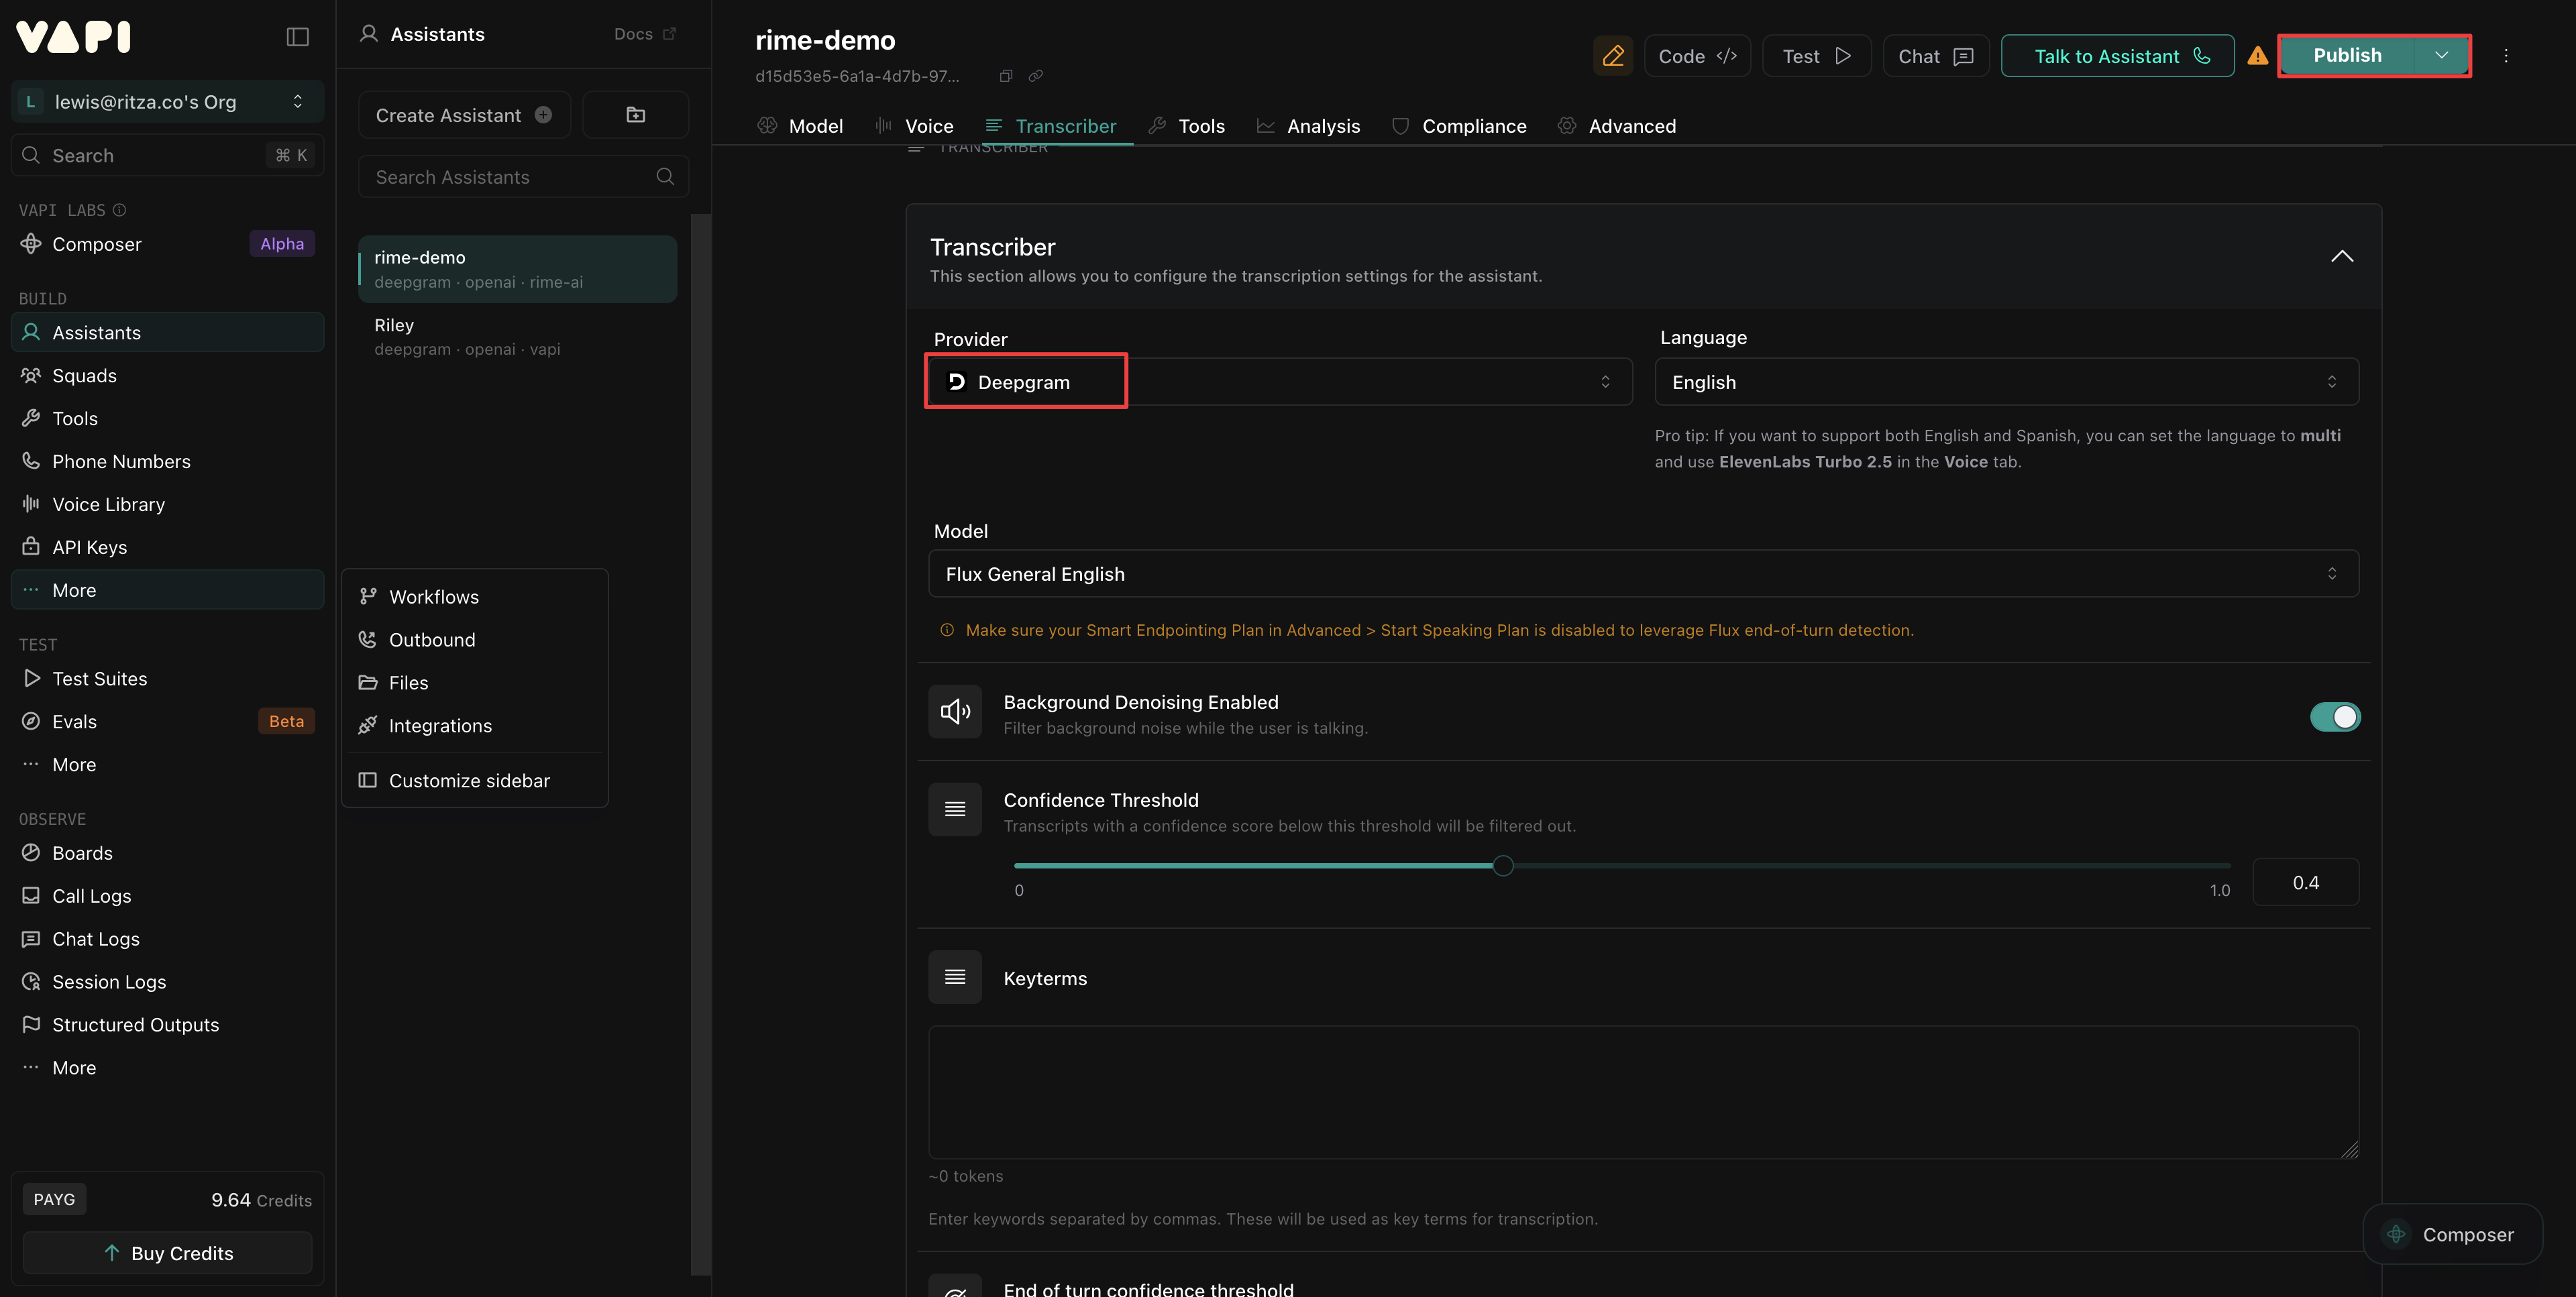
1.5 Publish the assistant
In the publishing popup window, select Skip and Publish.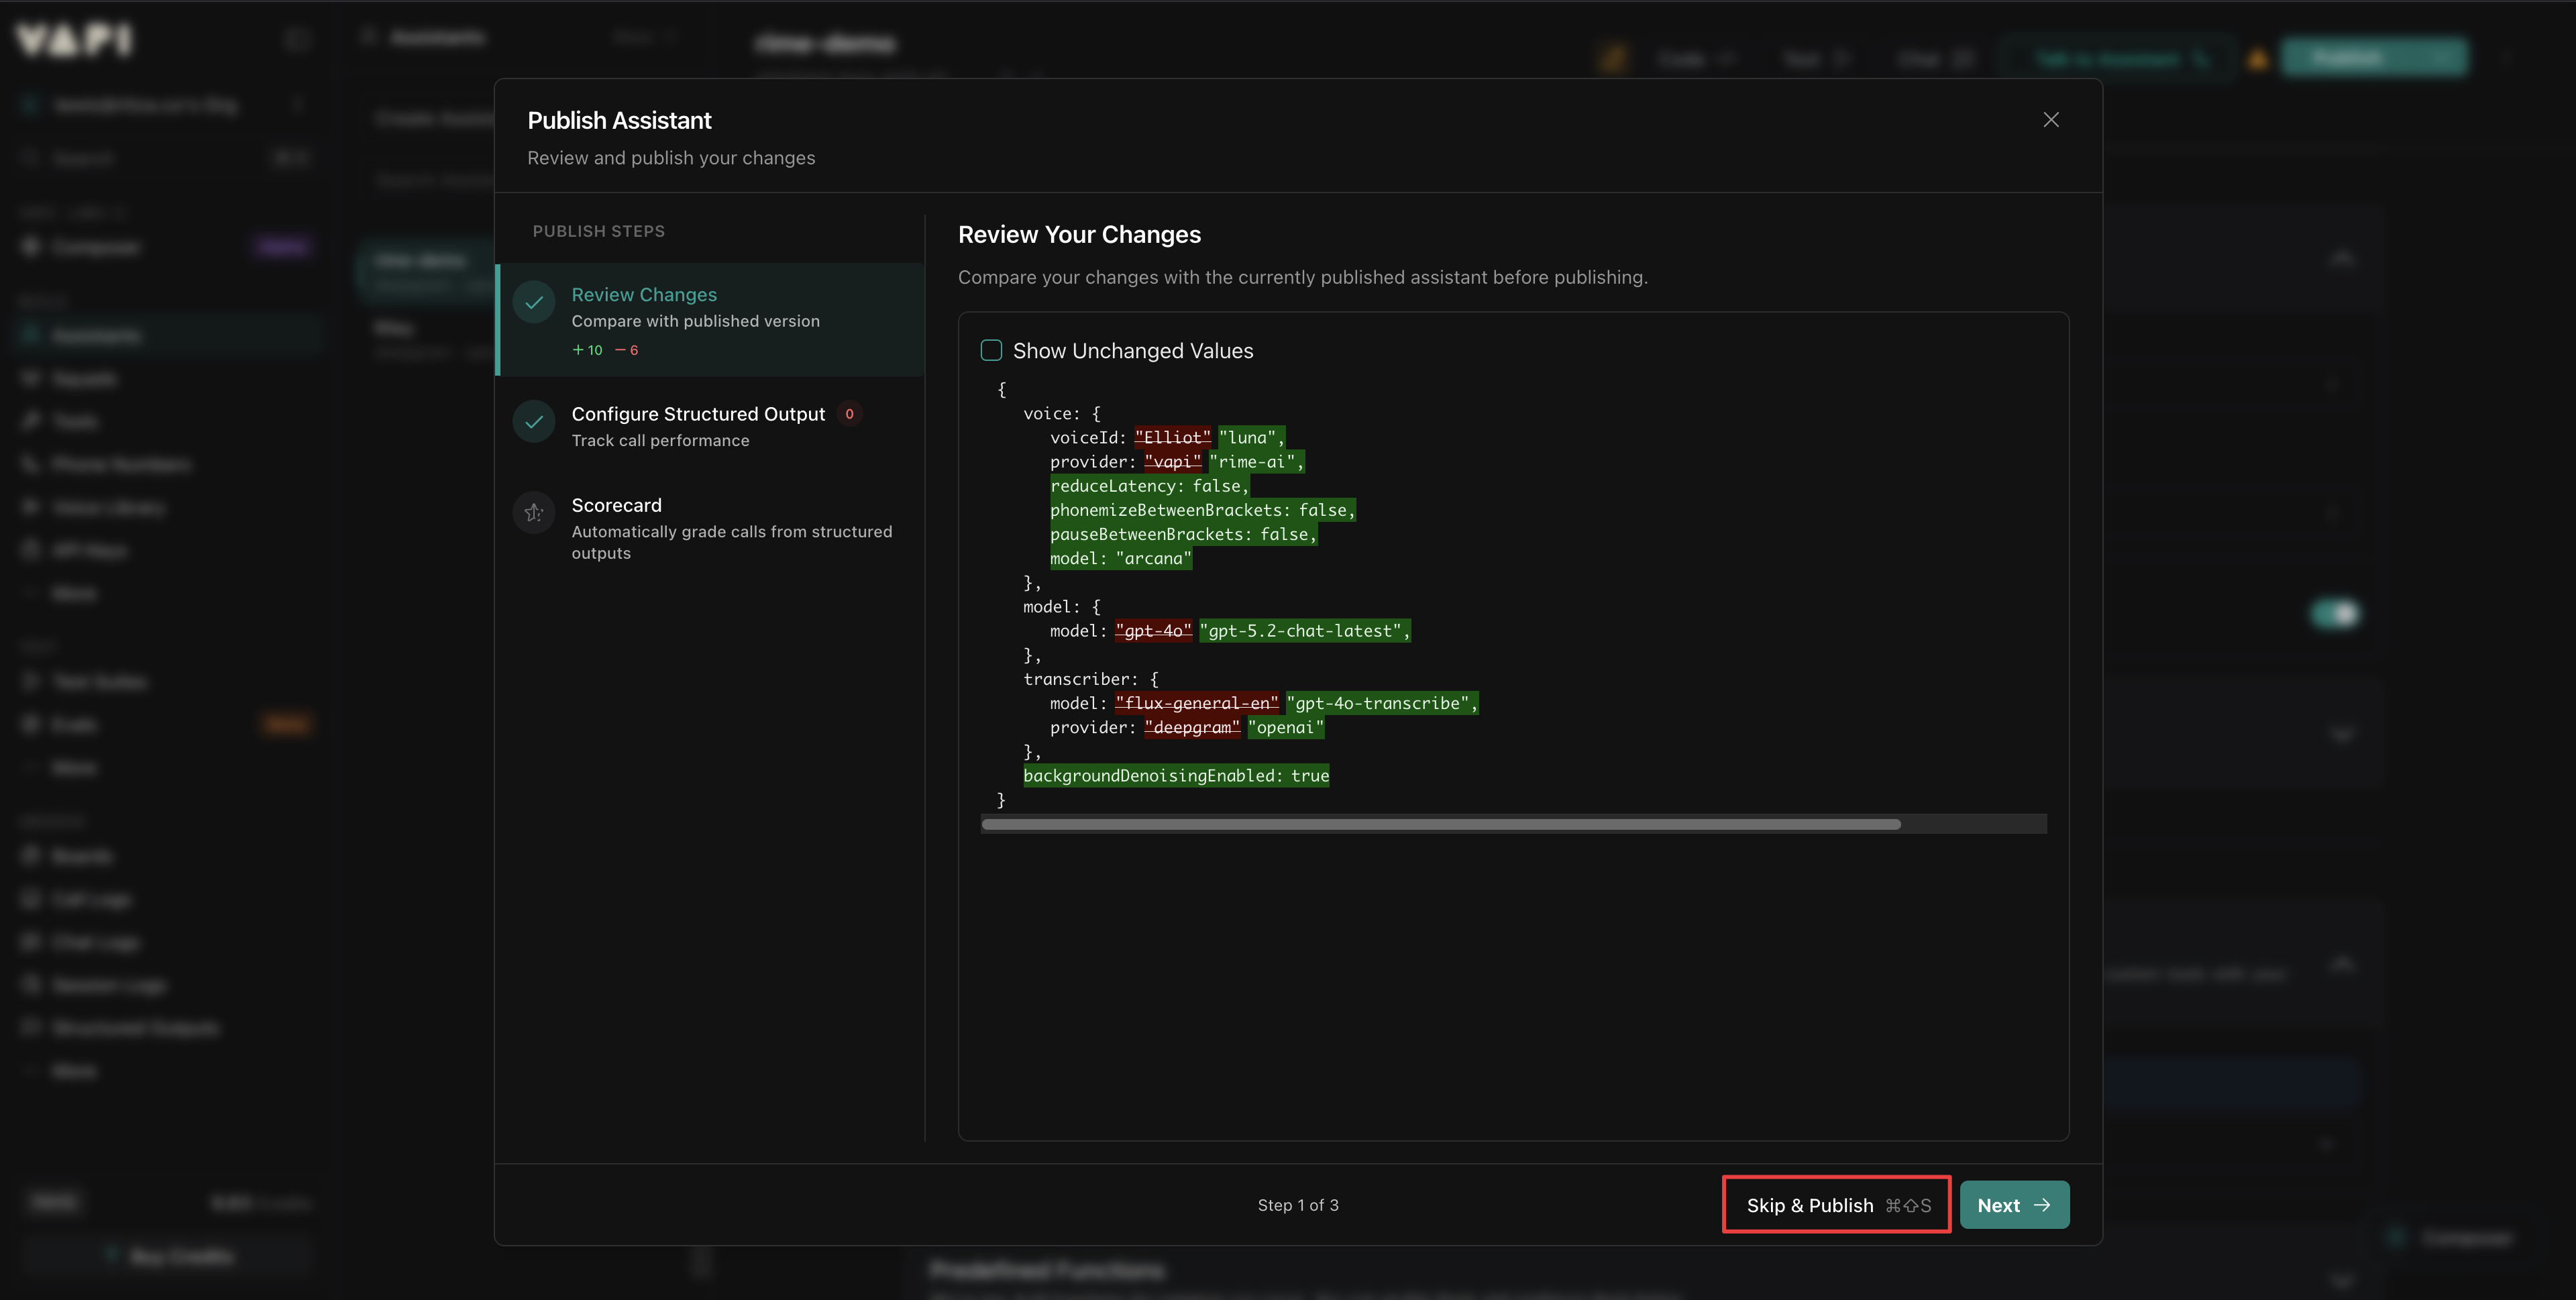
Step 2: Add your API keys to Vapi (optional)
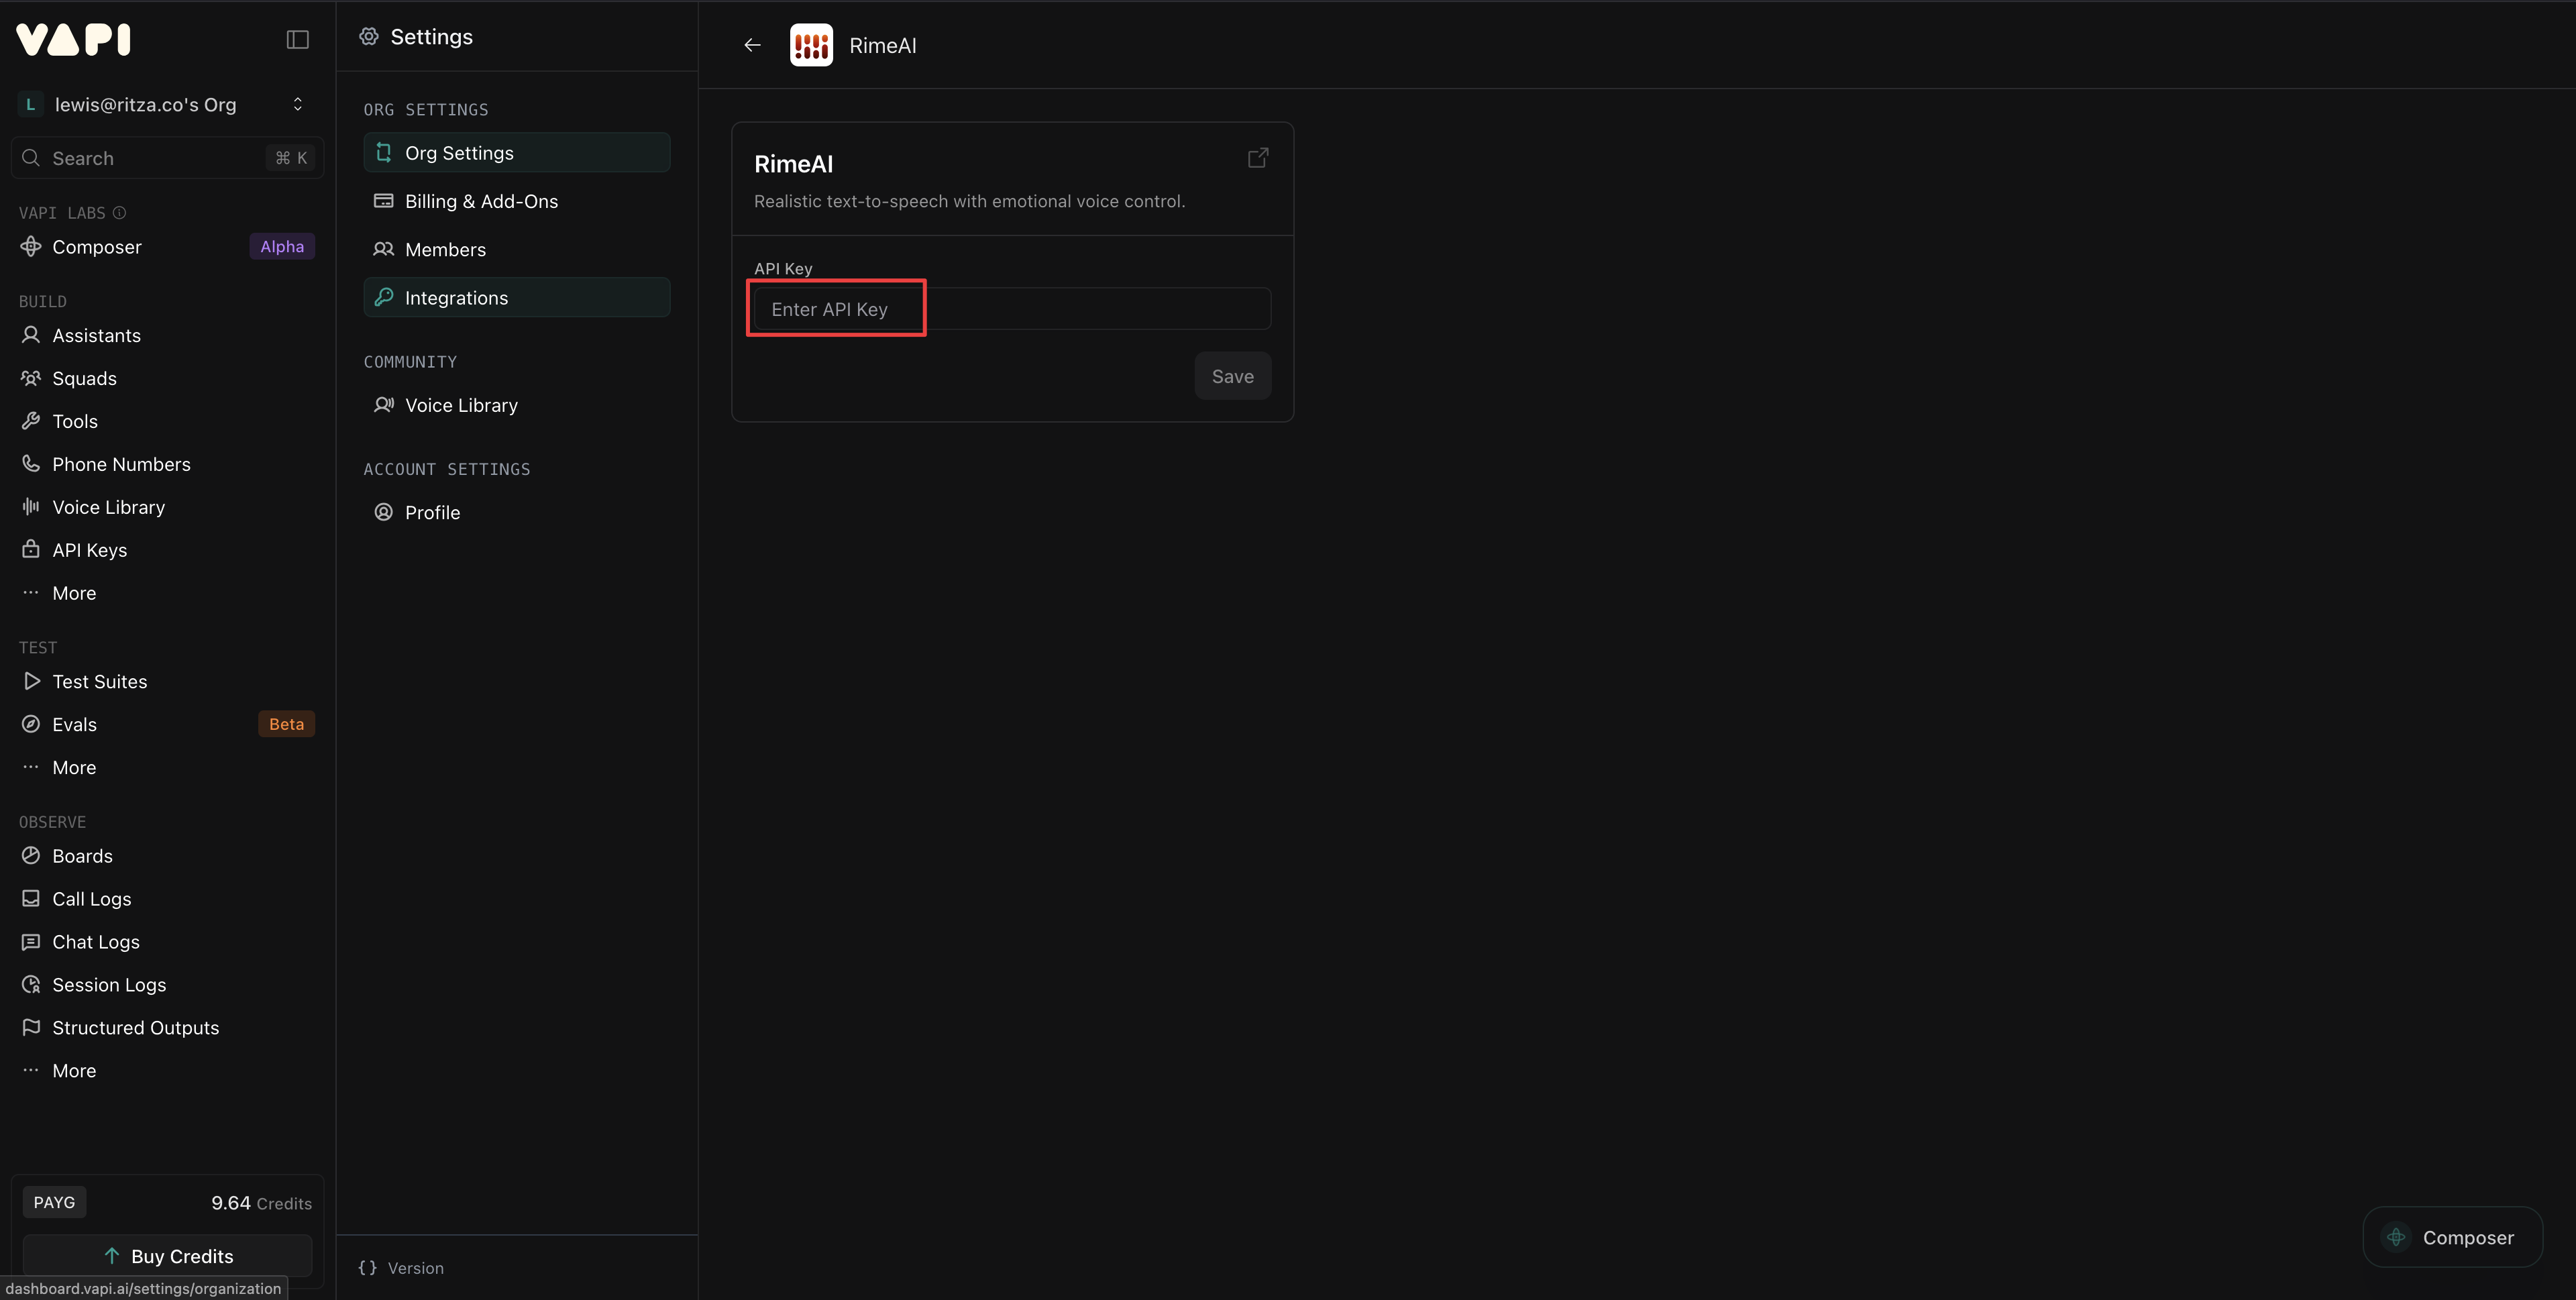
Vapi provides API access to all its supported models via its billing plans. However, if you already have a subscription plan for one or more of your assistant’s configured providers, you can enable the assistant to access them instead of using integrated Vapi billing: Under the Build heading, click More and select Integrations. Then, find your providers and add your API keys.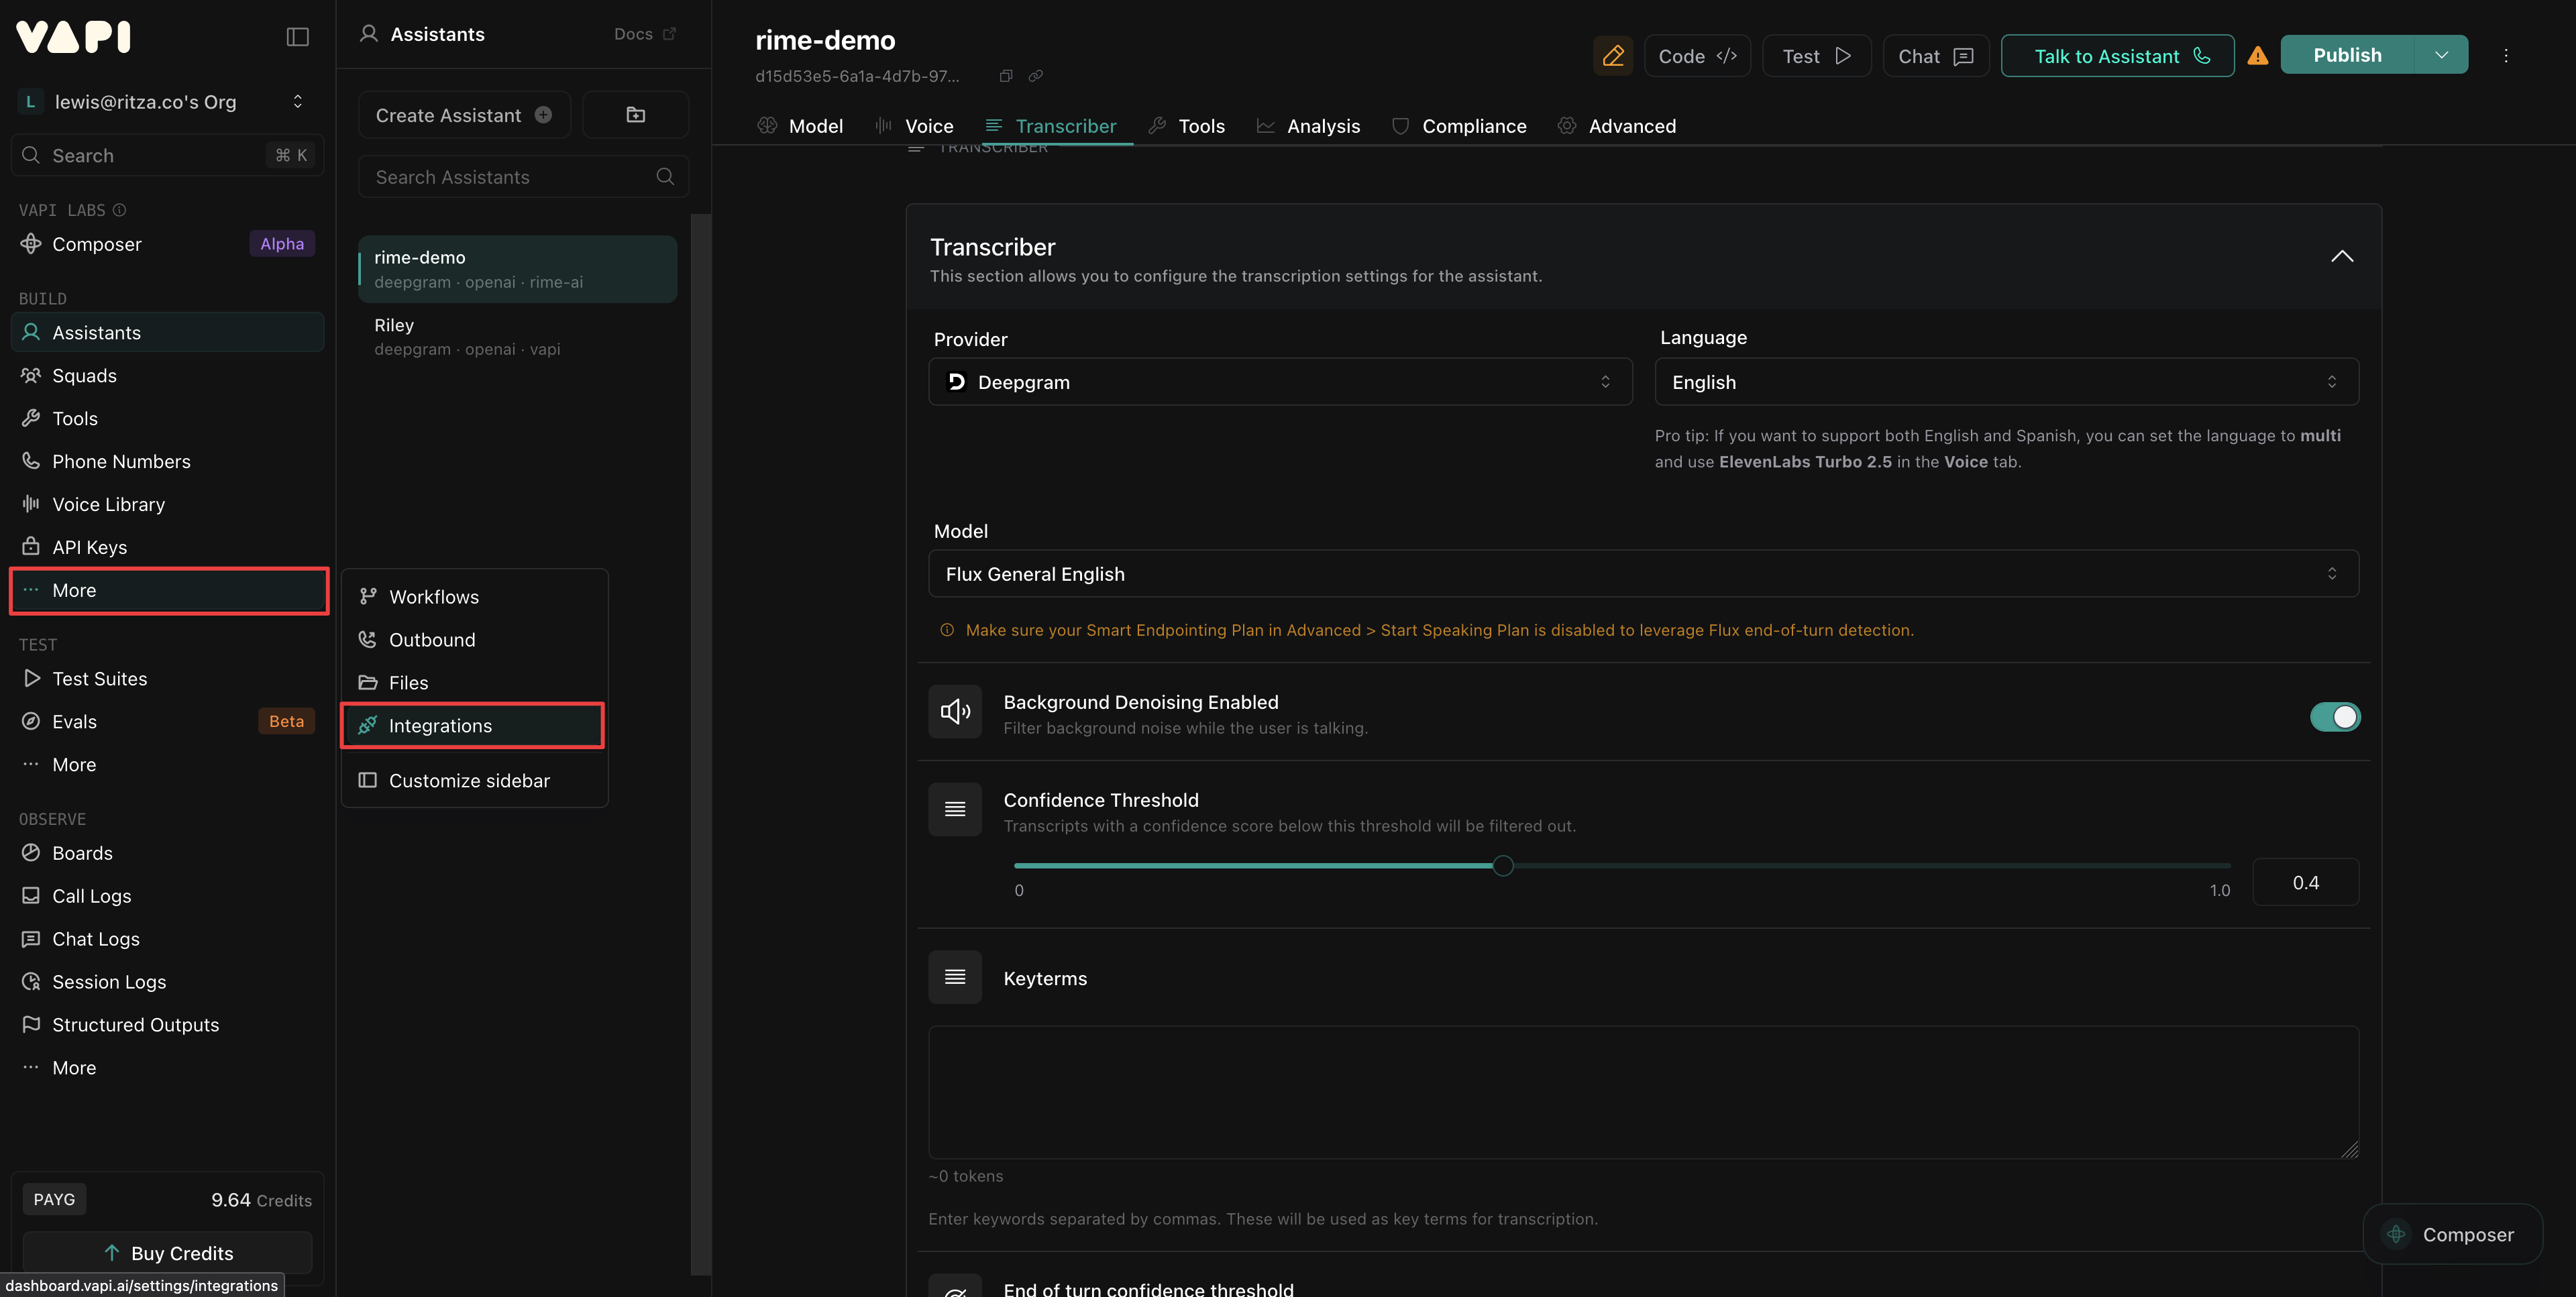
Step 3: Test your assistant
The above steps create the most basic assistant using Rime’s voices. Click Talk to Assistant in the dashboard to start a conversation in your browser.Next steps
To further customize your assistant, you can:- Try different voices: Audition other voices like
celeste,orion, andandromedaat app.rime.ai. - Add a phone number: Provision a contact number in the Vapi dashboard and assign it to your assistant for telephony
- Create a workflow: Program your assistant to do complex tasks using Vapi Workflows.
- Customize the personality: Update the system prompt to match your use case.